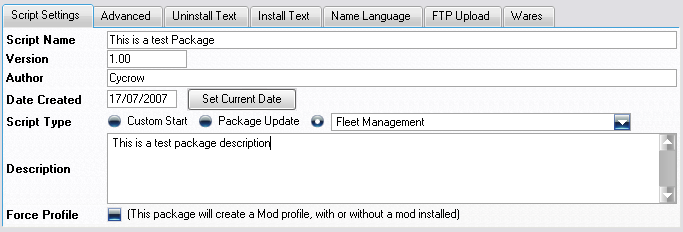
This is the basic settings for the script package, some of these are required, and most are useful.
This is the extra advanced settings, most of these settings are not required, but allows you to customize the package further.
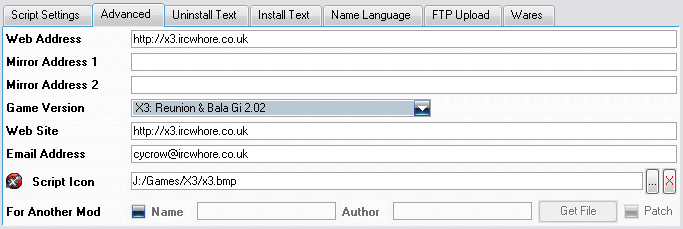
Script Icon:
The script icon is the icon that is displayed in the Installers list, this allows your packages to stand out, or easily recogonisable.
The icon that is currently set is displayed to the left.

You can either type in the file name to the icon, or click on the "..." button.
This opens the file select dialog to choose an icon file to use.
Finally, you can click on the "X" button to reset the icon back to the default.

For Another Mod:
The for another mod option allows you to set the parent package. This means that the package must be installed before you can install this one. So you can create an addon for another package, and make users only able to install it when they have the other package as well.
To use it, you just need to check the first Check Box.
Then you fill in the name and author boxes with the packages you want for the parent. The "Get File" opens will allow you to read the Name and Author directly from a spk file instead of typing it in manually. This way you can guarentee that they are entered correctly.
Finally, the "Patch" check box is for the patch mod mode. See here for more details.
The next 2 tabs are for the Install and Uninstall Text. These are texts that can be displayed when installing or uninstalling the package.
Bot the Uninstall Text and Install Text tabs are the same, so they function in the same way.
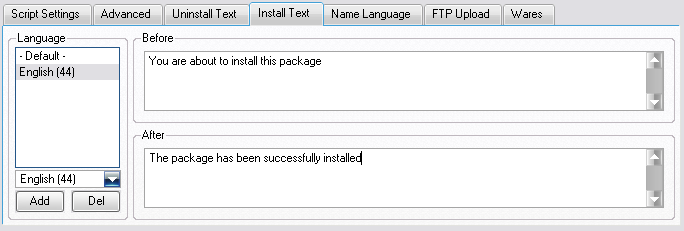
The Before Install text is displayed as you open the SPK file ready to install, and will ask if you wish to continue. This can be used to warn the user to any potential problems or guideance before they decided to install
The After Install text is displayed once the install is finished, this can be used to give advice on how to use the package, or anything you might need to do to start.
The Before Uninstall text is displayed once you select to uninstall the package, and will have a Yes/No question if they wish to continue. This could be to remind users that they might have to do something ingame first, ie disabling the AL Plugin.
The After Uninstall text is displayed once the uninstall is finished, this can be used to tell users if they need to do anything in game to finish the unisntalling, ie if using uninstall scripts, they might need to manually run them.
The text can be anything you want it to be, and will replace the default ones used by the installer. If none are set, the default ones are used. The text can also be in different languages, so it displays different text depending on what language the installer current is in.
The Default language is the text that is displayed if there is no matching languages.
To add languages, simply click on the drop down box to select the language and goto Add.
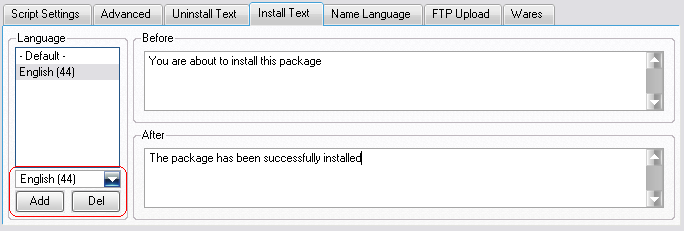
It will then be added into the language list. You can delete the language by selecting it in the list and going to "Delete".
Selecting the language from the list will change the Before and After boxes to show the current text for those language.
To change the text, simply select the language, then fill in the Before and After boxes, it is saved automatically.
The name language option allows you to set the package name for different languages. This is only for display purposes for the user, so they can see the name in thier language.
IE, for my Mercenaries guild package, the Main name is "Mercenaries Guild", but it has a name language for german as "Soeldnergilde". So any german users who have thier installers set to german, will display "Soeldnergilde" in the package display list, rather than "Mercenaries Guild".
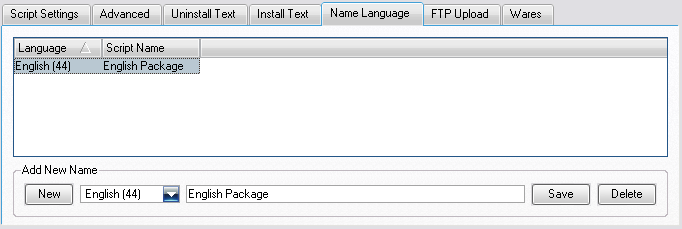
If there isn't a language that matches the installer language, then the standard Package Name will be used.
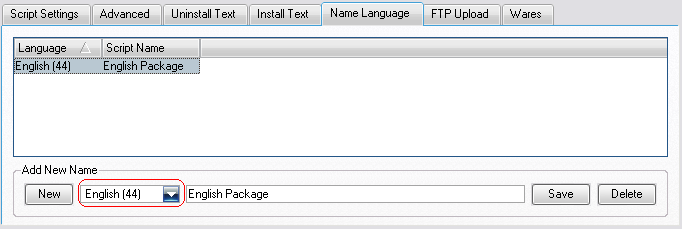
To add first select the language from the drop down box.
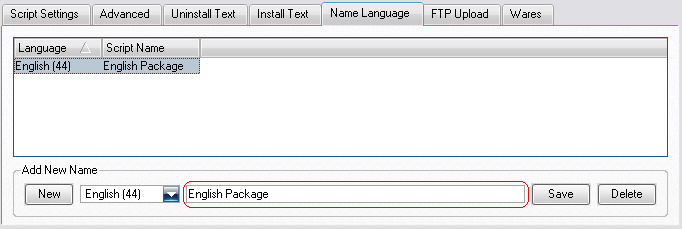
Then type in the name of the package for that language next to it.
The finally clicking on the "New" button and it will be added to the list above.
To change an existing name, select it from the list, and the fields below will be updated to the selected package. Just edit them and goto "Save".
You can use "Delete" while its select to remove it from the list.
This allows the program to automatically upload the saved package to an FTP Server, this allows you to get it ready to be hosted for users to download automatically.
These details will be filled in from the Default FTP Settings in the Configuration Dialog.
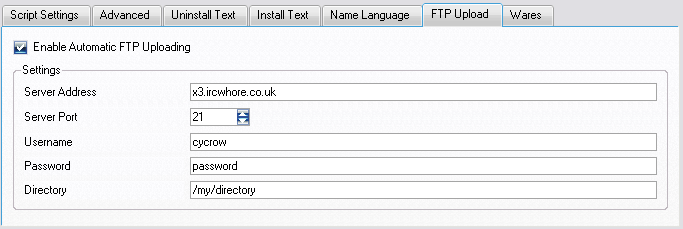
Check the checkbox at the top to Enable the feature, and everytime you save the package, it will be uploaded to your server. As well as the package, the Web Update file, and Master Package list file (x3scripts.dat) will also be uploaded to the server if these options have been enabled.
For the Master Package list, the package entry will be appended onto the file already on the FTP Server making you package instantlly available via the "Find New Packages" option.
The wares tab allows you to add new wares into the game for the package to use. Custom wares can be shared between multiple packages, so you can have multiple packages that use the same custom ware.
For custom wares to work, the user must also enable the option in the Installer.
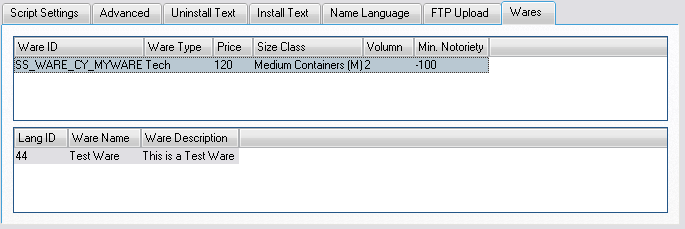
In the wares tab, there are 2 lists. The first is the list of wares, the 2nd is the text for the selected ware.
To add a new ware, right click in the first list to display the menu.
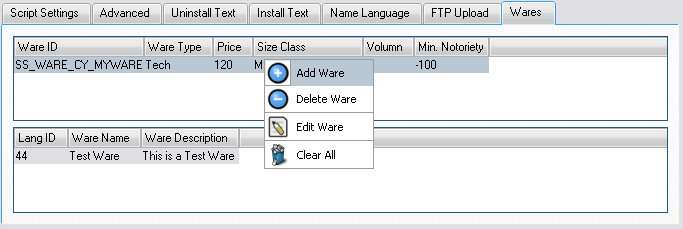
Select the "Add Ware" option to open the Add Ware Dialog.
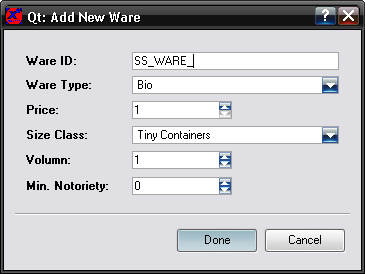
The Ware ID is the most imporarnt entry, this is how the ware will be identified, and is also what is used to get the ware object in scripts.
Its common to start the ID with SS_WARE_, but its not necessary.
Also, its a good idea to include a tag, like initials in the Ware ID. This will make it less likly for another user to use the same Ware ID and cause problems if both are installed. I use "SS_WARE_CY_" to start all my wares.
Once you have added the ware, it will display in the wares list. The next step is to add text for the ware. The text is what will be displayed in game for the Ware and can be in different languages.
To add text entry, select the ware in the top list, and right click in the bottom list to get the Text Menu.

Then select the option to Add Ware Text to open the Text Dialog.
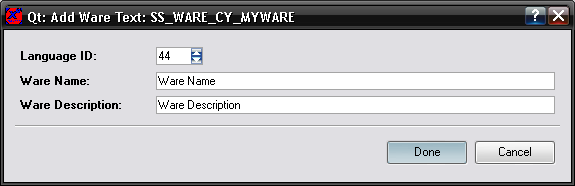
The Language ID, is the id of the language you want to text to be used for, 44 is for English.
The Ware Name is the name that is displayed in game as the name of the ware, and the description is the longer description for the ware that can be displayed in stations.
Clicking on "Done" will add the text into the 2nd list.
Using the menu in both lists, you can also remove the currently selected entries and edit them. Editing them will open up the same dialogs that you used to add them, but with the details already filled in from the selected ware.
To use the custom wares in scripts, you need to make use of the supplied scripts to get the correct id for wares.
There is a script called, plugin.scriptmanager.getware, that returns the ware object in the game. You send in the ID for the ware.
Its a good idea to check if the returned object is valid, if the ware is not installed, or the installer is not using Custom Wares, then it will return NULL.
$ware = call script 'plugin.plugman.getware' Ware ID = 'SW_WARE_AFTERBURNER'
if $ware
   ... (use ware)
end